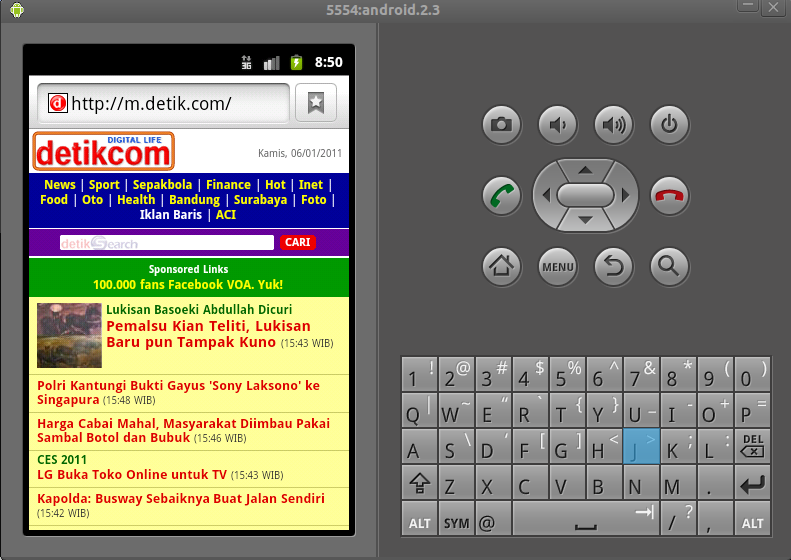
#1 Without Root
step 1
download apk file here
step 2
extract file then copy apk file to sd card
step 3
don't forget to check unknown resources at setting > application
step 4
use your file manager to find apk file
step 5
choose apk file then confirm it to begin installation process
step 6
when installation is completed do not open flash player but restart the phone
step 7
done!.. now.. flash player is already installed
#2 With Root
step 1
root your phone
*http://wallpapersayong.blogspot.com/2011/07/how-to-root-android-phone.html
step 2
download Rootex from Market/Google Play then install as usual
step 3
download flash player from here
step 4
extract file (apk and lib)
step 5
copy file to sd card
step 6
install apk file as usual
step 7
open Rootex then enter to data/data/com.adobe.flashplayer
step 8
delete lib directory then extract lib.rar to same directory or you can use overwrite method
step 9
open lib directory then touch and hold the file until "set permission" dialog appears
do set permission as bellow
| Read | Write | Execute |
---------------------------------------
Owner | [ v ] | [ v ] | [ v ] |
---------------------------------------
Group | [ v ] | [ ] | [ v ] |
---------------------------------------
Others | [ v ] | [ ] | [ v ] |
step 10
close Rootex then restart your phone
step 11
open your browser then type http://m.youtube.com to test flash player
"curiosity is motivation"
"letz share coz i only ask for information"
= = = = = = = = = = = = = = = = = = = = = = = =
[ indonesian translation ]
Bagaimana Cara Install Flash Player untuk Samsung Galaxy Mini dan Young
#1 Tanpa Root
step 1
donlot file apk disini
step 2
ekstrak file kemudian pindahkan ke sd card
step 3
jangan lupa untuk men-centang unknown resources di setting > application
step 4
gunakan file manager untuk menemukan file apk
step 5
pilih file apk kemudian konfirmasi dialog untuk memulai proses instalasi
step 6
saat instalasi selesai.. jangan buka flash player tapi restart ponsel terlebih dulu
step 7
selesai!.. sekarang.. flash player siap dipakai
#2 Dengan Root
step 1
root ponsel
*http://wallpapersayong.blogspot.com/2011/07/how-to-root-android-phone.html
step 2
donlot Rootex dari Market/Google Play kemudian install seperti biasanya
step 3
donlot flash player dari sini
step 4
extrak file (apk dan lib)
step 5
salin file ke sd card
step 6
install file apk seperti biasanya
step 7
buka Rootex kemudian masuk ke data/data/com.adobe.flashplayer
step 8
hapus direktori lib kemudian extrak lib.rar ke direktori yang sama atau gunakan metode overwrite
step 9
buka direktori lib kemudian tahan file sampai muncul dialog "set permission"
lakukan set permission seperti di bawah ini
| Read | Write | Execute |
---------------------------------------
Owner | [ v ] | [ v ] | [ v ] |
---------------------------------------
Group | [ v ] | [ ] | [ v ] |
---------------------------------------
Others | [ v ] | [ ] | [ v ] |
step 10
tutup Rootex kemudian restart ponsel
step 11
buka browser kemudian ketik http://m.youtube.com untuk ngetes flash player
"curiosity is motivation"
"letz share coz i only ask for information"
|
|
|
|---|
Showing posts with label android. Show all posts
9 Android Widgets That Will Make iPhone Users Jealous
One of the biggest advantages of Android over iPhone is widgets. Here are 9 of the best widgets available for Android, updated for 2012 and selected by haansspot.
#1 Clock and Weather
#2 Extended Control/Power Control
#3 Business Calendar
#4 Analytic
#5 Google Reader Ticker
#6 Pulse (News Reader)
#7 The Weather Channel
#8 Evernote
#9 Google Docs
But.. there are many more widgets for android that you can choose.. for social media you can use facebook widget, twitter widget, google plus widget or seesmic widget
"curiosity is motivation"
"letz share coz i only ask for information"
How to Install and Add Hebrew, Arabic and Unsupported Language Fonts to Android Phone
#step 1
Download DejaVu fonts from http://sourceforge.net/projects/dejavu/files/
#step 2
Unpack the package to retrieve DejaVuSans.ttf font file, inside the ttf folder.
#step 3
Rename the DejaVuSans.ttf to exactly DroidSansFallback.ttf
#step 4
Copy the DroidSansFallback.ttf to the root directory of the SD card on the phone
#step 5
Run Terminal Emulator
#step 6
Go into super user mode by entering the following command, then tap Enter :
su [enter]
#step 7.
Then run the following commands one by one:
Note:
Backup or rename the /system/fonts/DroidSansFallback.ttf if you don’t want to overwrite it.
mount -o rw,remount -t yaffs2 /dev/block/mtdblock3 /system [enter]
chmod 4755 /system/fonts/DroidSansFallback.ttf [enter]
dd if=/sdcard/DroidSansFallback.ttf of=/system/fonts/DroidSansFallback.ttf [enter]
reboot [enter]
Note:
Some other device may have different device node for the system partition, for which the mount command will have to be changed accordingly.
#step 8
The phone will reboot.
#step 9
Once restarted, the Android device will use the DroidSansFallback.ttf font for any characters that it cannot display.
This ensures that the default display fonts are not been messed up or changed
Other steps :
#1
Download fonts then copy 'DejaVuSans.ttf' to c:\ and rename it to 'DroidSans.ttf'
#2
Connect your phone to PC
#3
Open command prompt and type: adb remount
#4
Then type this command: adb push c:\DroidSans.ttf /system/fonts
#5
Restart your phone
ref :
http://adf.ly/5LaUC
http://adf.ly/5LaWY
"curiosity is motivation"
"letz share coz i only ask information"
= = = = = = = = = = = = = = = = = = = = = = = =
[ indonesian translation ]
Bagaimana Cara Install dan Menambah Ibrani, Arab dan Huruf yang Tidak Didukung pada Ponsel Android
(Mengatasi huruf kotak-kotak)
# langkah 1
Download DejaVu fonts dari http://sourceforge.net/projects/dejavu/files/
# langkah 2
Ekstrak paket untuk mengambil file font DejaVuSans.ttf di dalam folder ttf.
# langkah 3
Ubah nama DejaVuSans.ttf untuk persis DroidSansFallback.ttf
# langkah 4
Salin DroidSansFallback.ttf ke direktori root dari SD card di telepon
# langkah 5
Jalankan Emulator Terminal
# langkah 6
Masuk ke mode super user dengan memasukkan perintah berikut, kemudian tekan Enter :
su [enter]
# langkah 7
Kemudian jalankan perintah berikut satu per satu :
Catatan :
Backup atau ubah nama /system/fonts/DroidSansFallback.ttf jika tidak ingin menimpanya.
mount -o rw,remount -t yaffs2 /dev/block/mtdblock3 /system [enter]
chmod 4755 /system/fonts/DroidSansFallback.ttf [enter]
dd if=/sdcard/DroidSansFallback.ttf of=/system/fonts/DroidSansFallback.ttf [enter]
reboot [enter]
Catatan:
Beberapa perangkat lain mungkin memiliki node yang berbeda untuk partisi sistem.. jadi sesuaikan saja..
# langkah 8
Ponsel akan reboot.
# langkah 9
Setelah restart, perangkat Android akan menggunakan font DroidSansFallback.ttf untuk setiap karakter yang tidak dapat ditampilkan.
Hal ini memastikan bahwa huruf default tampilan yang tidak kacau atau diubah.
Cara lain :
# 1
Font Unduh lalu copy 'DejaVuSans.ttf' ke c: \ dan ganti dengan 'DroidSans.ttf'
# 2
Hubungkan ponsel ke PC
# 3
Buka Command prompt dan ketik : remount adb
# 4
Kemudian ketik perintah ini: push adb push c:\DroidSans.ttf /system/fonts
# 5
Restart ponsel
ref :
http://adf.ly/5LaUC
http://adf.ly/5LaWY
"curiosity is motivation"
"letz share coz i only ask information"
Flash Player for Android 10.1 armv6
Name : Flash Player [ download ] [ help ]
Version : 10.1
Date : 20120119
Size : 3.90 MB
License : Free
OS : Android
Category : Addons, Tools
Dev : Adobe
---------------------------------
Desc :
Flash player (swf)
Ref :
http://adf.ly/4qcJ4
http://adf.ly/4qcKb
"curiosity is motivation"
"letz share coz i only ask for information"
USB Tethering and Wireless Functions on Android OS (Part 2)
for part 1.. haansspot has shared about how to alter android phone into a modem.. now.. haansspot will share about how to alter android phone into a hotspot
please.. follow the instructions bellow..
#step 1
Choose Settings > Wireless & networks > Tethering & Portable hotspot > Portable Wi-Fi hotspot settings > Configure Wi-Fi hotspot
#step 2
fill the form as follows
exp:
SSID : haansspot
Security : WPA2 PSK
Password : 123456789
and then save
#step 3
now.. activate the configuration on menu "Portable Wi-Fi hotspot"
#step 4
now.. we move to notebook or pc
scan the Wi-Fi or hotspot.. when we found the hotspot (haansspot) then connect to the network and enter the security key
#step 5
check on Hide characters to make sure the entered password
#step 6
open the browser on notebook or pc.. and then type an address to visit
exp : http://haansspot.blogspot.com
#step 7
or use this connection for another services in the internet such as chatting, video calls, etc
Notes :
good and the least dependent signal connections are available in each area and we recommend using Internet package provided by each operator (preferably using unlimited package)
visit this page also (how to alter android phone into a hotspot) http://adf.ly/4pBR0 and this page (how to alter a notebook into a hotspot) http://adf.ly/4p6sl
= = = = = = = = = = = = = = = = = = = = = = = =
[ indonesian translation ]
Fungsi USB Tethering dan Wireless pada Android (Bagian 2)
pada bagian 1 indonesiadroid sudah berbagi bagaimana merubah handphone android menjadi modem.
untuk kali ini indonesiadroid akan berbagi bagaimana merubah handphone android menjadi hotspot
ikuti langkah-langkah di bawah ini
#step 1
pilih menu Settings > Wireless & networks > Tethering & Portable hotspot > Portable Wi-Fi hotspot settings > Configure Wi-Fi hotspot
#step 2
kemudian isikan sesuai dengan kolom
contoh :
SSID : indonesiadroidspot
Security : WPA2 PSK
Password : 123456789
selanjutnya pilih save
#step 3
setelah selesai melakukan konfigurasi diatas.. sekarang aktifkan menu Portable Wi-Fi hotspot
#step 4
sekarang kita beralih pada notebook atau pc
lakukan scanning Wi-Fi atau hotspot.. setelah notebook atau pc menemukan hotspot (indonesiadroidspot) maka lakukan koneksi dengan memasukkan password yang sudah diset.
#step 5
centang pada Hide characters untuk memastikan password yang diketik benar
#step 6
buka browser dari notebook atau pc.. kemudian ketik alamat yang ingin dikunjungi
cth : http://indonesiadroid.blogspot.com
#step 7
atau gunakan koneksi ini untuk kegiatan selain browsing.. seperti chatting atau video call
catatan :
baik dan tidaknya koneksi tergantung sinyal yang tersedia di daerah masing-masing dan sebaiknya gunakan paket internet yang disediakan oleh masing-masing operator (disarankan menggunakan paket unlimited)
kunjungi juga halaman ini (cara merubah hp android menjadi modem) http://adf.ly/4pBR0 dan halaman ini (cara merubah notebook menjadi hotspot) http://adf.ly/4p6sl
"curiosity is motivation"
"letz share coz i only ask for information"
please.. follow the instructions bellow..
#step 1
Choose Settings > Wireless & networks > Tethering & Portable hotspot > Portable Wi-Fi hotspot settings > Configure Wi-Fi hotspot
#step 2
fill the form as follows
exp:
SSID : haansspot
Security : WPA2 PSK
Password : 123456789
and then save
#step 3
now.. activate the configuration on menu "Portable Wi-Fi hotspot"
#step 4
now.. we move to notebook or pc
scan the Wi-Fi or hotspot.. when we found the hotspot (haansspot) then connect to the network and enter the security key
#step 5
check on Hide characters to make sure the entered password
#step 6
open the browser on notebook or pc.. and then type an address to visit
exp : http://haansspot.blogspot.com
#step 7
or use this connection for another services in the internet such as chatting, video calls, etc
Notes :
good and the least dependent signal connections are available in each area and we recommend using Internet package provided by each operator (preferably using unlimited package)
visit this page also (how to alter android phone into a hotspot) http://adf.ly/4pBR0 and this page (how to alter a notebook into a hotspot) http://adf.ly/4p6sl
= = = = = = = = = = = = = = = = = = = = = = = =
[ indonesian translation ]
Fungsi USB Tethering dan Wireless pada Android (Bagian 2)
pada bagian 1 indonesiadroid sudah berbagi bagaimana merubah handphone android menjadi modem.
untuk kali ini indonesiadroid akan berbagi bagaimana merubah handphone android menjadi hotspot
ikuti langkah-langkah di bawah ini
#step 1
pilih menu Settings > Wireless & networks > Tethering & Portable hotspot > Portable Wi-Fi hotspot settings > Configure Wi-Fi hotspot
#step 2
kemudian isikan sesuai dengan kolom
contoh :
SSID : indonesiadroidspot
Security : WPA2 PSK
Password : 123456789
selanjutnya pilih save
#step 3
setelah selesai melakukan konfigurasi diatas.. sekarang aktifkan menu Portable Wi-Fi hotspot
#step 4
sekarang kita beralih pada notebook atau pc
lakukan scanning Wi-Fi atau hotspot.. setelah notebook atau pc menemukan hotspot (indonesiadroidspot) maka lakukan koneksi dengan memasukkan password yang sudah diset.
#step 5
centang pada Hide characters untuk memastikan password yang diketik benar
#step 6
buka browser dari notebook atau pc.. kemudian ketik alamat yang ingin dikunjungi
cth : http://indonesiadroid.blogspot.com
#step 7
atau gunakan koneksi ini untuk kegiatan selain browsing.. seperti chatting atau video call
catatan :
baik dan tidaknya koneksi tergantung sinyal yang tersedia di daerah masing-masing dan sebaiknya gunakan paket internet yang disediakan oleh masing-masing operator (disarankan menggunakan paket unlimited)
kunjungi juga halaman ini (cara merubah hp android menjadi modem) http://adf.ly/4pBR0 dan halaman ini (cara merubah notebook menjadi hotspot) http://adf.ly/4p6sl
"curiosity is motivation"
"letz share coz i only ask for information"
USB Tethering and Wireless Functions on Android OS (Part 1)
Now.. haansspot will share about how to maximize USB Tethering and Wireless functions on Android OS to alter it into a modem
and now follow the instructions bellow..
#step 1
before going to next step.. please make sure that OS version on handphone is 2.2 (froyo) or higher
#step 2
connect your handphone to your notebook with data cable
#step 3
Choose Settings > Wireless & Networks > Tethering & Portable hotspot
#step 4
activate or check "USB Tethering"
#step 5
now.. check your notebook on network connection menu
there is lan card with ip address
#step 6
open your browser through your notebook and then type an address
exp : http://haansspot.blogspot.com
#step 7
or use this connection for another services in the internet such as chatting, video calls, etc
Notes :
good and the least dependent signal connections are available in each area and we recommend using Internet package provided by each operator (preferably using unlimited package)
visit this page also (how to alter android phone into a hotspot) http://adf.ly/4pCho and this page (how to alter a notebook into a hotspot) http://adf.ly/4p6sl
= = = = = = = = = = = = = = = = = = = = = = = =
[ indonesian translation ]
Fungsi USB Tethering dan Wireless pada Android (Bagian 1)
Kali ini haansspot akan berbagi tentang bagaimana cara memaksimalkan USB Tethering dan Wireless untuk dijadikan modem
tanpa basa basi.. ikuti langkah di bawah ini
#step 1
sebelum melakukan langkah selanjutnya pastikan versi os android pada handphone adalah 2.2 atau froyo keatas.
#step 2
siapkan kabel data kemudian sambungkan handphone ke notebook atau pc
#step 3
selanjutnya pilih menu Settings > Wireless & Networks > Tethering & Portable hotspot
#step 4
aktifkan atau centang pada "USB Tethering"
#step 5
cek pada notebook atau pc pada menu network connection.
secara otomatis akan ada card tambahan dengan ip address yang sudah terisi.
#step 6
buka browser dari notebook atau pc.. kemudian ketik alamat yang ingin dikunjungi
cth : http://indonesiadroid.blogspot.com
#step 7
atau gunakan koneksi ini untuk kegiatan selain browsing.. seperti chatting atau video call
catatan :
baik dan tidaknya koneksi tergantung sinyal yang tersedia di daerah masing-masing dan sebaiknya gunakan paket internet yang disediakan oleh masing-masing operator (disarankan menggunakan paket unlimited)
kunjungi halaman ini (cara merubah hp android menjadi hotspot) http://adf.ly/4pCho dan halaman ini (cara merubah notebook menjadi hotspot) http://adf.ly/4p6sl
"letz share coz i only ask for information"
"curiosity is motivation"
and now follow the instructions bellow..
#step 1
before going to next step.. please make sure that OS version on handphone is 2.2 (froyo) or higher
#step 2
connect your handphone to your notebook with data cable
#step 3
Choose Settings > Wireless & Networks > Tethering & Portable hotspot
#step 4
activate or check "USB Tethering"
#step 5
now.. check your notebook on network connection menu
there is lan card with ip address
#step 6
open your browser through your notebook and then type an address
exp : http://haansspot.blogspot.com
#step 7
or use this connection for another services in the internet such as chatting, video calls, etc
Notes :
good and the least dependent signal connections are available in each area and we recommend using Internet package provided by each operator (preferably using unlimited package)
visit this page also (how to alter android phone into a hotspot) http://adf.ly/4pCho and this page (how to alter a notebook into a hotspot) http://adf.ly/4p6sl
= = = = = = = = = = = = = = = = = = = = = = = =
[ indonesian translation ]
Fungsi USB Tethering dan Wireless pada Android (Bagian 1)
Kali ini haansspot akan berbagi tentang bagaimana cara memaksimalkan USB Tethering dan Wireless untuk dijadikan modem
tanpa basa basi.. ikuti langkah di bawah ini
#step 1
sebelum melakukan langkah selanjutnya pastikan versi os android pada handphone adalah 2.2 atau froyo keatas.
#step 2
siapkan kabel data kemudian sambungkan handphone ke notebook atau pc
#step 3
selanjutnya pilih menu Settings > Wireless & Networks > Tethering & Portable hotspot
#step 4
aktifkan atau centang pada "USB Tethering"
#step 5
cek pada notebook atau pc pada menu network connection.
secara otomatis akan ada card tambahan dengan ip address yang sudah terisi.
#step 6
buka browser dari notebook atau pc.. kemudian ketik alamat yang ingin dikunjungi
cth : http://indonesiadroid.blogspot.com
#step 7
atau gunakan koneksi ini untuk kegiatan selain browsing.. seperti chatting atau video call
catatan :
baik dan tidaknya koneksi tergantung sinyal yang tersedia di daerah masing-masing dan sebaiknya gunakan paket internet yang disediakan oleh masing-masing operator (disarankan menggunakan paket unlimited)
kunjungi halaman ini (cara merubah hp android menjadi hotspot) http://adf.ly/4pCho dan halaman ini (cara merubah notebook menjadi hotspot) http://adf.ly/4p6sl
"letz share coz i only ask for information"
"curiosity is motivation"
How to Run Android in Ubuntu (emulation)
since Google announced the release of android .. approximately October 2008, all know .. if this operating system is going to be the best operating system for mobile.
not open source but also because of the rather SDK support helps the developers.
enough for introduction.. to the point just now .. :)
The first .. download SDK file for Android at http://linux.softpedia.com/get/Programming/Interpreters/Android-32340.shtml
next .. make sure java is already installed .. if not yet follow these steps ..
select System > Administration > Synaptic Package Manager
in the search field type "OpenJDK" and then double click on "OpenJDK-6-jre"
for x86_64 machine user typ in the search field "ia32-libs" and then double click "ia32-libs"
or choose the another method "Mark for Installation "
whatever .. the important is two things above should be installed .. :)
now we are going into the SDK for Android ...
1. extract the SDK files for Android
2. go into folder "Tools"
3. double-click the file "Android"
4. select "Run"
5. window "Android SDK" and "AVD Manager" will appear
6. select "Settings"
7. in the "Misc" check "Force https ://..." then "Save & Apply"
8. Now we are going into menu "Installed Packages" then select "Update All" then "Install Accepted" ..
This installation process takes quite a long time .. so wait or listen to music while watching ..
not yet ..??? he he .. if its done .. close the windows update .. then all the updated files will be visible ..
Well .. This what we have been waiting for ..
Now we will create a "virtual device" ..
1. select the "Virtual Devices" then "New"
2. give the name "hans-android"
3. select the target (Android System)
4. specify the size to "SD Card "
5. add the "Hardware"
6. click on "Create AVD"
wait about 1 minute .. until notification of the results of the emulator that we make comes .. :)
7. click "Start"and then"Launch" .. hoooreeey .. emulator is ready .. :)
Tips:
# 1 emulator shortcut
to facilitate access to the Android Emulator we created a shortcut on the desktop ..
how ... is ...
1. Right click "Desktop" choose "Create Launcher"
2. give the name "Android Emulator"
3. on the command input "/ home/USERNAME/android-sdk-linux_86/tools/emulator @ hans-laptop (replace USERNAME in accordance with our property, @ hans-adjust laptop with virtual machine)
4. to "Icon" select according to taste .. :)
# 2 run applications on Android
1. double-click the new shortcut you created .. wait until android appears on your desktop
2. when the android has appeared please run an application or try to install the application
# 3 applications installation
1. open browser in android
2. navigate to the google search engine
3. look for android application
4. install
5. run applications
ok .. This first .. See you later .. with a new trick n tips .. he he ..
may be useful .. :)
= = = = = = = = = = = = = = = = = = = = = = = =
[ indonesian translation ]
Bagaimana Cara Menjalankan Android di Ubuntu (Emulasi)
sejak google mengumumkan n me-release android.. kalo gak salah oktober 2008, semua tahu kalo sistem operasi bakalan digadang-gadang sebagai sistem operasi terbaik untuk mobile.
bukan juga karena open source tapi dukungan SDK yang lumayan membantu para developer.
dah cukup basa basinya.. sekarang ke pointnya aja.. :)
pertama ambil dulu file SDK for android di http://linux.softpedia.com/get/Programming/Interpreters/Android-32340.shtml
selanjutnya.. pastikan java sudah terinstall.. kalo lum ikuti langkah berikut..
pilih System > Administration > Synaptic Package Manager
pada bagian search ketikan "openjdk" terus dobel klik "openjdk-6-jre"
selain itu untuk pengguna mesin x86_64 pada bagian search ketikan kembali "ia32-libs" terus dobel klik "ia32-libs"
ato bisa juga dengan memilih metode "Mark for Installation"
apa ja dech.. yang penting dua hal diatas harus diinstall.. :)
sekarang kita ke SDK for android...
1. extract file SDK for Android
2. masuk ke folder "Tools"
3. dobel klik file "Android"
4. pilih "Run"
5. jendela "Android SDK" dan "AVD Manager" akan muncul
6. pilih "Settings"
7. pada bagian "Misc" centang "Force https://..." selanjutnya "Save & Apply"
8. Sekarang ke menu "Installed Packages" kemudian pilih "Update All" selanjutnya "Install Accepted"..
proses install ini memakan waktu lumayan lama.. jadi tunggu aja sambil nonton ato dengerin musik..
udah lum..??? he he.. kalo udah.. tutup update window.. maka semua file yang diupdate akan kelihatan..
Nah.. ini dia yang ditunggu-tunggu.. (kereta kalee.. :)..)
sekarang kita akan buat "virtual Device"..
1. pilih "Virtual Devices" selanjutnya pilih "New"
2. beri nama "hans-android"
3. pilih target (Android System)
4. tentukan ukuran untuk "SD Card"
5. tambahkan "Hardware" yang ingin dimiliki pada emulator
6. klik "Create AVD"
tunggu kira-kira 1 menit.. sampai ada notifikasi hasil dari emulator yang kita buat.. :)
7. klik "Start" terus "Launch".. hoooreeey.. emulator dah jadi.. :)
Tips:
#1 emulator shortcut
untuk mempermudah akses ke Android Emulator kita buatin shorcut di desktop..
caranya... aaaadalah...
1. klik kanan "Desktop" pilih "Create Launcher"
2. beri nama "Android Emulator"
3. pada bagian command masukan "/home/USERNAME/android-sdk-linux_86/tools/emulator @hans-laptop (ganti USERNAME sesuai dengan milik kita, @hans-laptop sesuaikan dgn virtual machine)
4. untuk "Icon" pilih suka-suka dech.. :)
#2 menjalankan aplikasi di Android
1. dobel klik shortcut yang baru kita buat tunggu sampai android masuk desktop
2. ketika android dah muncul silahkan jalanin aplikasi atau coba menginstall aplikasi
#3 instalasi aplikasi
1. buka browser yang ada di android
2. arahkan ke google search engine
3. cari aplikasi android
4. install
5. jalankan aplikasi
ok dech.. ini dulu.. ntar sambung lagi.. dengan tips n trick yang baru.. he he..
semoga bermanfaat.. :)
"curiosity is motivation"
"letz share coz i only ask for information"
How to Root Android Phone
What is root? for linux operating system user of course it's so friendly. Root or super user is account with full authorization to manage operating system so it has right to change, add, or delete system
While.. rooting it self means.. how to change user to super user or root
Here.. we want to share.. how to root android phone on samsung galaxy mini
#step 1
PC with windows xp operating system
#step 2
Microsoft .NET Framework 2.0+ , Microsoft .NET framework 4.0
you can download them here or if you use Windows Vista or Windows 7 they are not necessary any more
#step 3
Data cable/micro USB
#step 4
Install kies software
#step 5
Make sure that the battery is full
#step 6
Unmount SD CARD
#step 7
Download root software here (SuperOneClick)
Now.. we are going to next steps..
#step 1
Set android to ADB mode, select Setting > Applications > Development >
Check USB Debugging
#step 2
Insert phone to PC and wait until driver installation is finished
#step 3
Run SuperOneClick then click root and wait until process is finished
Now.. you can release the data cable.. then see your android phone.. if super user application with skull image appears then the installation is successful.. if it's not.. please restart your phone
This tutorial is not just for samsung galaxy mini.. but you can practice to another phone.
for other phones you can see here
You can see the tutorial video for more understanding
#FAQ
Q :
Does android phone need to root process?
A :
No
Q :
What are the benefits of root process?
A :
System Modification, We can delete application in internal memory to resize internal memory capacity and so on
Q :
Does warranty not accept after root process?
A :
Yes
Q :
Can we unroot the phone?
A :
Yes
Q :
What are the risks?
A :
Some sources say that root process will eliminate warranty but if it is so.. just unroot the phone.. :)
= = = = = = = = = = = = = = = = = = = = = = = =
[ indonesian translation ]
Bagaimana Cara nge-Root Ponsel Android
Apa sih root itu ? yang sudah terbiasa dengan system operasi berbasis linux tentu sudah familier dengan istilah root, root atau kadang di sebut superuser bisa di katakan account yang mempunyai kekuasaan penuh pada system operasi berbasis linux, artinya root mempunyai hak akses penuh untuk merubah, menambah, menghapus bahkan merusak system.
Sedangkan Nge-root sendiri artinya adalah usaha untuk merubah user biasa agar bisa menjadi superuser atau root.
Disini kami akan berbagi cara nge-root android phone, kali ini saya akan mencoba nge-root samsung android mini.
#step 1
Komputer dengan sistem operasi Microsoft Windows XP
#step 2
Microsoft .NET Framework 2.0+ , Microsoft .NET framework 4.0 yang bisa anda donwload disini atau jika anda menggunakan Windows Vista atau Windows 7 anda tidak perlu lagi install
#step 3
Kabel data/mikro USB
#step 4
Install software kies nya terlebih dahulu, software ini ada di sertakan dalam paket pembelian samsung android.
#step 5
Pastikan batrei terisi penuh.
#step 6
Pastikan sd card anda dalam kondisi unmount.
#step 7
Donwload software bantu untuk nge-root, kita akan menggunakan software bantu SuperOneClick bisa anda download disini
Kalau persiapan di atas sudah di lakukan kita lanjut langkah-langkahnya.
#step 1
Setting android ke adb mode masuk ke setting > Applications > Development > Centang USB debugging.
#step 2
Pasang / Colok hp ke komputer , tunggu sampai install driver nya selesai.
#step 3
Jalankan file SuperOneClick.exe yang sudah di dowload tadi, setelah terbuka klik root , tunggu sampai selesai.
Oke droids sekarang anda sudah bisa melepas kabel mikro usb, lihat di android anda kalau sudah ada aplikasi bernama superuser dengan gambar tengkorak berarti anda sudah berhasil nge-root android anda, jika tidak muncul coba restart handphone anda.
Cara ini tidak hanya untuk handphone android samsung galaxy mini, tapi juga bisa di gunakan untuk merk yang lain. untuk lebih jelasnya android apa saja yang bisa di root dengan cara ini anda bisa langsung menuju kesini
Kalau masih kurang paham juga bisa di simak video di bawah ini.
#FAQ :
Q:
Apakah semua android phone perlu di root?
A:
Tidak, tergantung kebutuhan saja, yang belum mengerti betul tentang android tidak di sarankan.
Q:
Apa manfaat kalau android kita di root?
A:
Agar kita bisa bebas memodifikasi sistem nya, contoh
Hapus-hapus aplikasi bawaan dari hape untuk menghemat memori internal.
Memindahkan aplikasi yang hanya bisa disimpan di internal memory ke SD card, sehingga internal memory bisa lebih longgar.
Kita bisa install aplikasi yang membutuhkan akses root.
Q:
Apakah rooting dapat menghilangkan garansi?
A:
YA
Q:
Apa bisa dikembalikan ke unroot lagi?
A:
Bisa
Q:
Apa resikonya?
A:
Dari berbagai sumber ada yang bilang kalau nge-root android bisa menghilangkan garansi, ada juga sih yang bilang tidak ada pengaruh, kalau saja bisa menghilangkan garansi tinggal di unroot lagi kan.
"curiosity is motivation"
"letz share coz i only ask for information"
Subscribe to:
Posts (Atom)