Name : Winamp [ download ] [ help ] Version : 5.62 Date : 30 June 2011 Size : 12 MB License : Free OS : Windows Category : Tools, Audios Dev : Winamp --------------------------------- Desc : Audio, Music, Video Player
Ref :
"curiosity is motivation" "letz share coz i only ask for information"
#registration 1. open http://susestudio.com | create account | sign in 2. enter e-mail address | request invitation 3. choose the reasons | send my invitation sooner 4. wait for reply | open e-mail | open the link 5. choose the ID (exp: yahoo) | agree 6. write display name | continue
#making distro 1. choose a base template 2. select architecture | enter name your appliance 3. select software tab | customize your packages 4. select configuration tab | customize 5. general | time zone | users and groups 6. personalize | upload new logo | upload new background | preview 7. go to startup | edit EULA (end user license agreement) 9. select build tab | choose the format
#finalizing 1. test drive (flash) 2. download
#instalation 1. burn ISO 2. run CD (live CD) or install, 3. on desktop | live installer | cutomize YaST 4. disk | partition based | create partition setup | custom partitioning 5. expand tree hardisk | choose partition (exp: dev/sda5) 6. format partition | choose file system (ext3) | mount partition | /root 7. back | accept | formatting....... 8. enter username and password for root 9. install 10.restart 11.GRUB | choose your OS
#uninstalling 1. from windows desktop 2. start | administrative tools | computer management | storage | disk management | choose linux partition | delete volume 3. insert windows vista CD | system recovery options | startup repair | restart
= = = = = = = = = = = = = = = = = = = = = = = = [ indonesian translation ] Bagaimana Cara Membuat Linux Live CD (Suse Studio)
#registrasi 1. open http://susestudio.com | create account | sign in 2. enter e-mail address | request invitation 3. choose the reasons | send my invitation sooner 4. wait for reply | open e-mail | open the link 5. choose the ID (exp: yahoo) | agree 6. write display name | continue
#membuat distro 1. choose a base template 2. select architecture | enter name your appliance 3. select software tab | customize your packages 4. select configuration tab | customize 5. general | time zone | users and groups 6. personalize | upload new logo | upload new background | preview 7. go to startup | edit EULA (end user license agreement) 9. select build tab | choose the format
#penyelesaian 1. test drive (flash) 2. download
#instalasi 1. burn ISO 2. run CD (live CD) or install, 3. on desktop | live installer | cutomize YaST 4. disk | partition based | create partition setup | custom partitioning 5. expand tree hardisk | choose partition (exp: dev/sda5) 6. format partition | choose file system (ext3) | mount partition | /root 7. back | accept | formatting....... 8. enter username and password for root 9. install 10.restart 11.GRUB | choose your OS
#menghapus (uninstall) 1. from windows desktop 2. start | administrative tools | computer management | storage | disk management | choose linux partition | delete volume 3. insert windows vista CD | system recovery options | startup repair | restart
add this into source list: deb http://ppa.launchpad.net/loell/ppa/ubuntu karmic main deb-src http://ppa.launchpad.net/loell/ppa/ubuntu karmic main and add its gpg key $ sudo apt-key adv -recv-keys -keyserver keyserver.ubuntu.com 0xc23b005d874996dc8d03a3c0d0d3c959db2035a6
#step 2 kemudian tambahkan baris berikut: deb http://ppa.launchpad.net/loell/ppa/ubuntu karmic main deb-src http://ppa.launchpad.net/loell/ppa/ubuntu karmic main Kemudian tambahkan gpg key-nya: $ sudo apt-key adv -recv-keys -keyserver keyserver.ubuntu.com 0xc23b005d874996dc8d03a3c0d0d3c959db2035a6
#step 3 Setelah itu, update apt: $ sudo apt-get update
#step 4 Setelah terupdate, install paket gyachi dengan menggunakan perintah: $ sudo apt-get install gyachi
#step 5 Setelah terinstall, jalankan Gyachi melalui menu "Applications | Internet | GYaChE Improved"
#step 1 download driver at http://goo.gl/UOIR #step 2 enter text mode or press CTRL+ALT+F2 #step 3 log in as root or use sudo command #step 4 turn off GDM "sudo /etc/init.d/gdm stop" #step 5 back to driver directory #step 6 type "sudo sh nama_file_driver.run"
#step 7 follow installation wizard #step 8 wait until finish #step 9 type "sudo /etc/init.d/gdm start" to return to the desktop
notes : please restart computer to optimize driver installation
Bagaimana Cara Install Driver VGA (NVIDIA GEFORCE G102M) pada Notebook (Asus K40IN) di Ubuntu
#step 1 pertama download paket driver di http://goo.gl/UOIR #step 2 masuk ke text mode dengan menekan CTRL+ALT+F2 #step 3 setelah itu masuk dengan root ato gunakan perintah sudo #step 4 matikan GDM dengan mengetik "sudo /etc/init.d/gdm stop" #step 5 setelah itu kembali ke directory dimana file driver disimpan #step 6 selanjutnya ketikan "sudo sh nama_file_driver.run" #step 7 ikuti langkah-langkah dalam instalation wizard #step 8 setelah proses wizard selesai maka akan kembali ke terminal #step 9 ketikan "sudo /etc/init.d/gdm start" maka desktop akan tampil kembali catatan: sebaiknya restart agar mendapatkan hasil yang lebih maksimal
"curiosity is motivation" "letz share coz i only ask for information"
Download compiz-check wget http://blogage.de/files/9124/download -O compiz-check make it executable chmod +x compiz-check run compiz-check ./compiz-check
Bagaimana Cara Mengecek Kompatibilitas Compiz di Ubuntu
Download compiz-check wget http://blogage.de/files/9124/download -O compiz-check kemudian buat menjadi executable chmod +x compiz-check setelah itu jalankan compiz-check ./compiz-check
"curiosity is motivation" "letz share coz i only ask for information"
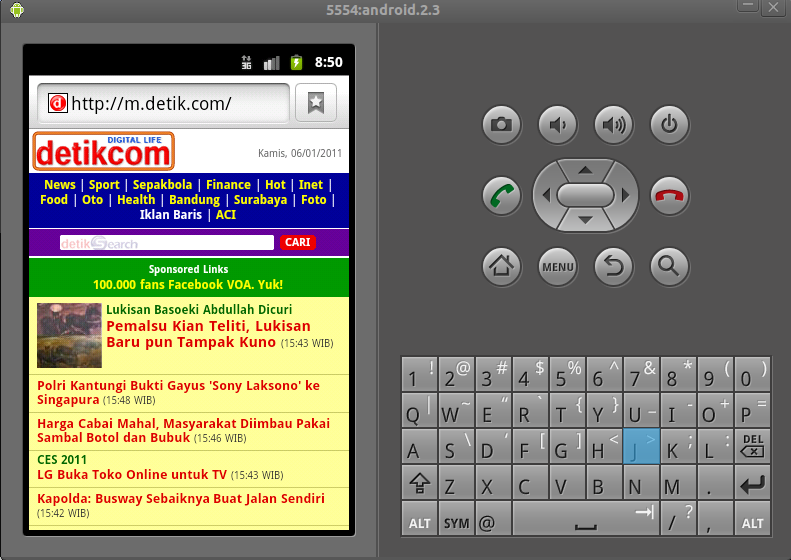
since Google announced the release of android .. approximately October 2008, all know .. if this operating system is going to be the best operating system for mobile. not open source but also because of the rather SDK support helps the developers. enough for introduction.. to the point just now .. :)
The first .. download SDK file for Android at http://linux.softpedia.com/get/Programming/Interpreters/Android-32340.shtml next .. make sure java is already installed .. if not yet follow these steps .. select System > Administration > Synaptic Package Manager in the search field type "OpenJDK" and then double click on "OpenJDK-6-jre" for x86_64 machine user typ in the search field "ia32-libs" and then double click "ia32-libs" or choose the another method "Mark for Installation " whatever .. the important is two things above should be installed .. :) now we are going into the SDK for Android ... 1. extract the SDK files for Android 2. go into folder "Tools" 3. double-click the file "Android" 4. select "Run" 5. window "Android SDK" and "AVD Manager" will appear 6. select "Settings" 7. in the "Misc" check "Force https ://..." then "Save & Apply" 8. Now we are going into menu "Installed Packages" then select "Update All" then "Install Accepted" .. This installation process takes quite a long time .. so wait or listen to music while watching .. not yet ..??? he he .. if its done .. close the windows update .. then all the updated files will be visible .. Well .. This what we have been waiting for .. Now we will create a "virtual device" .. 1. select the "Virtual Devices" then "New" 2. give the name "hans-android" 3. select the target (Android System) 4. specify the size to "SD Card " 5. add the "Hardware" 6. click on "Create AVD" wait about 1 minute .. until notification of the results of the emulator that we make comes .. :) 7. click "Start"and then"Launch" .. hoooreeey .. emulator is ready .. :)
Tips: # 1 emulator shortcut to facilitate access to the Android Emulator we created a shortcut on the desktop .. how ... is ... 1. Right click "Desktop" choose "Create Launcher" 2. give the name "Android Emulator" 3. on the command input "/ home/USERNAME/android-sdk-linux_86/tools/emulator @ hans-laptop (replace USERNAME in accordance with our property, @ hans-adjust laptop with virtual machine) 4. to "Icon" select according to taste .. :) # 2 run applications on Android 1. double-click the new shortcut you created .. wait until android appears on your desktop 2. when the android has appeared please run an application or try to install the application # 3 applications installation 1. open browser in android 2. navigate to the google search engine 3. look for android application 4. install 5. run applications ok .. This first .. See you later .. with a new trick n tips .. he he .. may be useful .. :)
Bagaimana Cara Menjalankan Android di Ubuntu (Emulasi)
sejak google mengumumkan n me-release android.. kalo gak salah oktober 2008, semua tahu kalo sistem operasi bakalan digadang-gadang sebagai sistem operasi terbaik untuk mobile. bukan juga karena open source tapi dukungan SDK yang lumayan membantu para developer. dah cukup basa basinya.. sekarang ke pointnya aja.. :)
pertama ambil dulu file SDK for android di http://linux.softpedia.com/get/Programming/Interpreters/Android-32340.shtml selanjutnya.. pastikan java sudah terinstall.. kalo lum ikuti langkah berikut.. pilih System > Administration > Synaptic Package Manager pada bagian search ketikan "openjdk" terus dobel klik "openjdk-6-jre" selain itu untuk pengguna mesin x86_64pada bagian search ketikan kembali "ia32-libs" terus dobel klik "ia32-libs" ato bisa juga dengan memilih metode "Mark for Installation" apa ja dech.. yang penting dua hal diatas harus diinstall.. :) sekarang kita ke SDK for android... 1. extract file SDK for Android 2. masuk ke folder "Tools" 3. dobel klik file "Android" 4. pilih "Run" 5. jendela "Android SDK" dan "AVD Manager" akan muncul 6. pilih "Settings" 7. pada bagian "Misc" centang "Force https://..." selanjutnya "Save & Apply" 8. Sekarang ke menu "Installed Packages" kemudian pilih "Update All" selanjutnya "Install Accepted".. proses install ini memakan waktu lumayan lama.. jadi tunggu aja sambil nonton ato dengerin musik.. udah lum..??? he he.. kalo udah.. tutup update window.. maka semua file yang diupdate akan kelihatan.. Nah.. ini dia yang ditunggu-tunggu.. (kereta kalee.. :)..) sekarang kita akan buat "virtual Device".. 1. pilih "Virtual Devices" selanjutnya pilih "New" 2. beri nama "hans-android" 3. pilih target (Android System) 4. tentukan ukuran untuk "SD Card" 5. tambahkan "Hardware" yang ingin dimiliki pada emulator 6. klik "Create AVD" tunggu kira-kira 1 menit.. sampai ada notifikasi hasil dari emulator yang kita buat.. :) 7. klik "Start" terus "Launch".. hoooreeey.. emulator dah jadi.. :)
Tips: #1 emulator shortcut untuk mempermudah akses ke Android Emulator kita buatin shorcut di desktop.. caranya... aaaadalah... 1. klik kanan "Desktop" pilih "Create Launcher" 2. beri nama "Android Emulator" 3. pada bagian command masukan "/home/USERNAME/android-sdk-linux_86/tools/emulator @hans-laptop (ganti USERNAME sesuai dengan milik kita, @hans-laptop sesuaikan dgn virtual machine) 4. untuk "Icon" pilih suka-suka dech.. :) #2 menjalankan aplikasi di Android 1. dobel klik shortcut yang baru kita buat tunggu sampai android masuk desktop 2. ketika android dah muncul silahkan jalanin aplikasi atau coba menginstall aplikasi #3 instalasi aplikasi 1. buka browser yang ada di android 2. arahkan ke google search engine 3. cari aplikasi android 4. install 5. jalankan aplikasi ok dech.. ini dulu.. ntar sambung lagi.. dengan tips n trick yang baru.. he he.. semoga bermanfaat.. :)
"curiosity is motivation" "letz share coz i only ask for information"
#step 1 go to www.youtube.com #step 2 choose video that would be downloaded #step 3 let it finish downloading the entire video #step 4 open file manager then go to folder "File System\tmp" #step 5 copy video to video folder.. finish.. :)
#step 1 pertama.. masuk aja ke situs www.youtube.com #step 2 terus pilih video yang mau didownload #step 3 biarkan sampai youtube selesai mendownload seluruh video #step 4 buka file manager kemudian masuk ke folder "File System" selanjutnya ke folder "tmp" #step 5 terakhir copy video ke folder video.. selesai dech.. :)
"curiosity is motivation" "letz share coz i only ask for information"
next .. text editor will appear containing the name of the computer .. change it as you want .. Do not forget to save .. then exit the editor and the last... restart computer
selanjutnya.. akan muncul text editor yang berisi nama komputer.. ubah dech.. sesuai keinginan.. jangan lupa save.. trus keluar dari editor dan yang terakhir.. restart komputer
"curiosity is motivation" "letz share coz i only ask for information"
download antinetcut application extract downloaded file next.. open terminal (Applications - Accessories - Terminal) log in as root or super user haansspot@haansspot-K40IN:~$ sudo su [sudo] password for haansspot: go to extracted folder root@haansspot-K40IN:/home/haansspot# cd Downloads/antinetcut root@haansspot-K40IN:/home/haansspot/Downloads/antinetcut# to run antinetcut root@haansspot-K40IN:/home/haansspot/Downloads/antinetcut# ./antinetcut.py start antinetcut status command root@haansspot-K40IN:/home/haansspot/Downloads/antinetcut# ./antinetcut.py status to stop antinetcut root@haansspot-K40IN:/home/haansspot/Downloads/antinetcut# ./antinetcut.py stop
download aplikasi antinetcut extract file yang udah didownload selanjutnya buka terminal (Applications - Accessories - Terminal) masuk sebagai root atau super user haansspot@haansspot-K40IN:~$ sudo su [sudo] password for haansspot: masuk ke folder yang udah diextract root@haansspot-K40IN:/home/haansspot# cd Downloads/antinetcut root@haansspot-K40IN:/home/haansspot/Downloads/antinetcut# jalankan antinetcut root@haansspot-K40IN:/home/haansspot/Downloads/antinetcut# ./antinetcut.py start untuk mengetahui status antinetcut root@haansspot-K40IN:/home/haansspot/Downloads/antinetcut# ./antinetcut.py status untuk menghentikan antinetcut root@haansspot-K40IN:/home/haansspot/Downloads/antinetcut# ./antinetcut.py stop
"curiosity is motivation" "letz share coz i only ask for information"
.zip $ unzip .zip .rar if it doesn't work it means rar is not installed yet install rar with following command bellow. $ sudo apt-get install unrar then how to run rar command $ unrar .rar .tar.gz $ tar zxvf file_name.tar.gz to create tar.gz the command is $ tar cf .tar.gz file file file … .tar.bz2 $ tar jxvf .tar.bz2 to create .tar.bz2 the command is $ tar jcvf .tar.bz2 file file file …
.zip $ unzip .zip .rar jika tidak bisa berarti unrar blm diinstall.. maka intall aplikasinya dulu dengan perintah dibawah ini.. $ sudo apt-get install unrar selanjutnya perintah rar seperti di bawah ini.. $ unrar .rar .tar.gz $ tar zxvf nama file.tar.gz untuk membentuk .tar.gz perintahnya adalah.. $ tar cf .tar.gz file file file … .tar.bz2 $ tar jxvf .tar.bz2 untuk membentuk .tar.bz2 adalah $ tar jcvf .tar.bz2 file file file …
"curiosity is motivation" "letz share coz i only ask for information"
Ubuntu offers a facility that can make the desktop more beautiful sight, namely the 3D Desktop. Desktop 3D facility is similar to features in Windows Vista AERO.
To run this feature, on Ubuntu you can choose the menu System > Preferences > Appereance
After that you can select the Visual Effects tab. Within that tab there are 3 options, namely: - None - No Desktop Effects (3D Desktop) - Normal - Run Desktop Effects with simple effects - Extra - Run Desktop Effects with full effect
Please select according to your computer capabilities. If the option can be selected, then the 3D Desktop can already active.
However, if it appears a message that Desktop Effects could not be in the switch, then you need to check whether your video card is adequate to use this feature. At least 64MB of memory on the VGA has been there. If not, you are required to buy a better VGA card. If you have an NVIDIA or ATI graphics card, you need to install the driver first. Please refer to the website of the hardware vendor.
Distro Ubuntu menawarkan sebuah fasilitas yang bisa membuat desktop lebih indah terlihat, yaitu 3D Desktop. Fasilitas 3D Desktop ini hampir sama dengan fitur AERO pada Windows Vista.
Untuk menjalankan fitur ini, pada Ubuntu anda dapat memilih menu System > Preferences > Appereance. Setelah itu anda dapat memilih tab Visual Effects. Di dalam tab tersebut terdapat 3 pilihan, yaitu : - None - Tanpa Desktop Effects (3D Desktop) - Normal - Jalankan Desktop Effects dengan efek yang sederhana - Extra - Jalankan Desktop Effects dengan efek yang lengkap
Silahkan pilih sesuai dengan kemampuan komputer anda. Jika opsi bisa dipilih, maka 3D Desktop sudah bisa aktif.
Namun, jika muncul pesan bahwa Desktop Effects tidak bisa di aktifkan, maka anda perlu mencek apakah video card anda sudah memadai untuk menggunakan fitur ini. Paling tidak 64MB memori pada VGA telah ada. Jika kurang, anda diharuskan membeli VGA Card yang lebih baik. Jika anda memiliki VGA card NVIDIA atau ATI, anda perlu menginstall drivernya terlebih dahulu. Silahkan merujuk ke website dari vendor hardware tersebut.
"curiosity is motivation" "letz share coz i only ask for information"
Favicon adalah icon kecil yang ada di url address bar, bisa juga masuk dalam daftar bookmark jika kita mem bookmark suatu situs yang mempunyai Favicon, untuk ukurannya favicon sendiri adalah 16 x 16 pixel.
Cara pemasangannya bisa anda Upload dan letakkan di direcrtory root dengan nama "favicon.ico"
atau bisa juga letakkan tag di bawah ini dalam header anda
Displaying the status of YM (Yahoo Messenger) on our website is very important, especially for Web sites that are engaged in the business, use it as a CS (Customer Support), if for community website... can be as a place to chat and so on.
How to make YM status is very easy... just add HTML tag below
Menampilkan status YM (yahoo Messanger) di website kita sangatlah penting, terutama bagi website-website yang bergerak dalam bidang bisnis, gunanya ya sebagai CS (Customer Support), kalau untuk website community ya.. bisa sebagai tempat ngobrol dsb.
Cara membuat status YM di website kita sangatlah mudah sekali kita tinggal lah menambahkan tag HTML berikut:
Dimana: "haanssim" adalah ID Yahoo kamu, ID Yahoo dapat diperoleh jika anda mempunyai email di yahoo, jika tidak ... ya segera bikin saja email yahoo.. Ex: jika email yahoo kamu haanssim@yahoo.com, maka ID YM kamu adalah haanssim
Pada gambar diatas terlihat 2 icon dengan status yang berbeda.. yang atas menunjukkan kalo user lagi online dan yang bawah offline
"curiosity is motivation" "letz share coz i only ask for information"
Did you ever see a website with additional video from youtube? Hmm ... look good right? You can add it by adding an HTML script to embed the video, how?
You go to Youtube.com
1. Search videos you want 2. After that copy the embed code 3. Paste on your web page
Apakah anda pernah melihat suatu website dengan tambahan video dari youtube? Hmm... terlihat bagus kan? Anda bisa menambahkan nya dengan cara menambahkan script HTML embed video tersebut, caranya? Anda buka Youtube.com 1. Search video yang anda inginkan 2. Setelah itu copy code embed nya 3. Paste di halaman website anda
"curiosity is motivation" "letz share coz i only ask for information"
What is root? for linux operating system user of course it's so friendly. Root or super user is account with full authorization to manage operating system so it has right to change, add, or delete system
While.. rooting it self means.. how to change user to super user or root
Here.. we want to share.. how to root android phone on samsung galaxy mini
#step 1 PC with windows xp operating system #step 2 Microsoft .NET Framework 2.0+ , Microsoft .NET framework 4.0 you can download them here or if you use Windows Vista or Windows 7 they are not necessary any more #step 3 Data cable/micro USB #step 4 Install kies software #step 5 Make sure that the battery is full #step 6 Unmount SD CARD #step 7 Download root software here (SuperOneClick)
Now.. we are going to next steps.. #step 1 Set android to ADB mode, select Setting > Applications > Development > Check USB Debugging #step 2 Insert phone to PC and wait until driver installation is finished #step 3 Run SuperOneClick then click root and wait until process is finished
Now.. you can release the data cable.. then see your android phone.. if super user application with skull image appears then the installation is successful.. if it's not.. please restart your phone
This tutorial is not just for samsung galaxy mini.. but you can practice to another phone. for other phones you can see here
You can see the tutorial video for more understanding
#FAQ Q : Does android phone need to root process? A : No
Q : What are the benefits of root process? A : System Modification, We can delete application in internal memory to resize internal memory capacity and so on
Q : Does warranty not accept after root process? A : Yes
Q : Can we unroot the phone? A : Yes
Q : What are the risks? A : Some sources say that root process will eliminate warranty but if it is so.. just unroot the phone.. :)
Apa sih root itu ? yang sudah terbiasa dengan system operasi berbasis linux tentu sudah familier dengan istilah root, root atau kadang di sebut superuser bisa di katakan account yang mempunyai kekuasaan penuh pada system operasi berbasis linux, artinya root mempunyai hak akses penuh untuk merubah, menambah, menghapus bahkan merusak system.
Sedangkan Nge-root sendiri artinya adalah usaha untuk merubah user biasa agar bisa menjadi superuser atau root.
Disini kami akan berbagi cara nge-root android phone, kali ini saya akan mencoba nge-root samsung android mini.
#step 1 Komputer dengan sistem operasi Microsoft Windows XP #step 2 Microsoft .NET Framework 2.0+ , Microsoft .NET framework 4.0 yang bisa anda donwload disini atau jika anda menggunakan Windows Vista atau Windows 7 anda tidak perlu lagi install #step 3 Kabel data/mikro USB #step 4 Install software kies nya terlebih dahulu, software ini ada di sertakan dalam paket pembelian samsung android. #step 5 Pastikan batrei terisi penuh. #step 6 Pastikan sd card anda dalam kondisi unmount. #step 7 Donwload software bantu untuk nge-root, kita akan menggunakan software bantu SuperOneClick bisa anda download disini Kalau persiapan di atas sudah di lakukan kita lanjut langkah-langkahnya. #step 1 Setting android ke adb mode masuk ke setting > Applications > Development > Centang USB debugging. #step 2 Pasang / Colok hp ke komputer , tunggu sampai install driver nya selesai. #step 3 Jalankan file SuperOneClick.exe yang sudah di dowload tadi, setelah terbuka klik root , tunggu sampai selesai.
Oke droids sekarang anda sudah bisa melepas kabel mikro usb, lihat di android anda kalau sudah ada aplikasi bernama superuser dengan gambar tengkorak berarti anda sudah berhasil nge-root android anda, jika tidak muncul coba restart handphone anda.
Cara ini tidak hanya untuk handphone android samsung galaxy mini, tapi juga bisa di gunakan untuk merk yang lain. untuk lebih jelasnya android apa saja yang bisa di root dengan cara ini anda bisa langsung menuju kesini
Kalau masih kurang paham juga bisa di simak video di bawah ini.
#FAQ :
Q: Apakah semua android phone perlu di root?
A: Tidak, tergantung kebutuhan saja, yang belum mengerti betul tentang android tidak di sarankan.
Q: Apa manfaat kalau android kita di root?
A: Agar kita bisa bebas memodifikasi sistem nya, contoh Hapus-hapus aplikasi bawaan dari hape untuk menghemat memori internal. Memindahkan aplikasi yang hanya bisa disimpan di internal memory ke SD card, sehingga internal memory bisa lebih longgar. Kita bisa install aplikasi yang membutuhkan akses root.
Q: Apakah rooting dapat menghilangkan garansi?
A: YA
Q: Apa bisa dikembalikan ke unroot lagi?
A: Bisa
Q: Apa resikonya?
A: Dari berbagai sumber ada yang bilang kalau nge-root android bisa menghilangkan garansi, ada juga sih yang bilang tidak ada pengaruh, kalau saja bisa menghilangkan garansi tinggal di unroot lagi kan.
"curiosity is motivation" "letz share coz i only ask for information"


